NOTE: I have written a new post on configuring a Primary, Caching and Root name server here
After a long silence I have finally had some time to leave a post on my blog. This one is on how I set up a DNS server in CentOS 6.
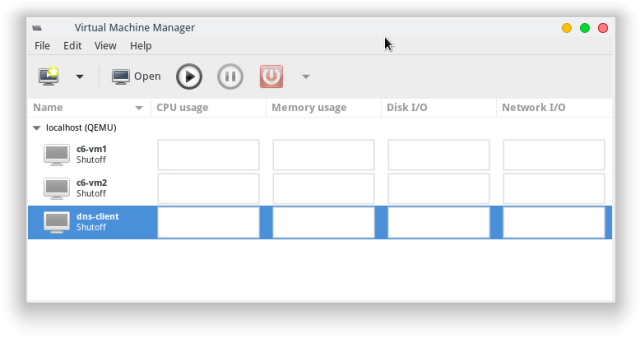
The setup was pretty simple, I used KVM/Virt-Manager to setup 3 VMs. Two of them were CentOS 6, one being the primary server and the second being a caching only server while the third was an openSUSE 13.1 client who I would use to test out my two servers. One handy feature most virtual machine management tools have is the snapshot feature. I made use of this by taking snapshots every time I got a certain feature working. This meant that I could mess around without fear of losing a working set of settings.
The network setup was simple too, I created one isolated virtual network which would not allow the devices connected to it to see the outside world, and another NAT virtual network which would connect only to my primary DNS server so that it could send queries out to the router.
Now to configure the primary server I had to install the bind package, which was easy enough.
yum install bind
cp /etc/named.conf /etc/named.conf.BAK
vim /etc/named.conf
Once in named.conf, I configured the file to reflect my needs. I wont go over the details though as you can easily search them up.
//
// named.conf
//
// Provided by Red Hat bind package to configure the ISC BIND named(8) DNS
// server as a caching only nameserver (as a localhost DNS resolver only).
//
// See /usr/share/doc/bind*/sample/ for example named configuration files.
//

options {
    directory "/var/named/";
    allow-query {127.0.0.1; 192.168.19.0/24;};
    recursion yes;
    forwarders { 8.8.8.8; };
};
zone "19.168.192.in-addr.arpa" {
    type master;
    file "mydb-for-192-168-19";
    allow-update { none; };
};
zone "ushamim.org" {
    type master;
    file "mydb-for-ushamim-org";
    allow-update { none; };
};
Once that is done, all that remains for DNS to work is the files for forward/reverse lookups. These can be created in /var/named/. Here are the contents of mine:
# mydb-for-192-168-19
$TTL 3D
@ IN SOA vm1.ushamim.org. webmaster.ushamim.org. (
    1 ; Serial
    8H ; Refresh
    2H ; Retry
    1W ; Expire
    1D ; Negative Cache TTL
);
@ IN NS vm1.ushamim.org.
53.19.168.192.in-addr.arpa IN PTR vm1.ushamim.org.
166.19.168.192.in-addr.arp IN PTR vm2.ushamim.org.
3.19.168.192.in-addr.arp IN PTR vm3.ushamim.org.
# mydb-for-ushamim-org
$TTL 3D
@ IN SOA vm1.ushamim.org. webmaster.ushamim.org.(
    1 ; Serial
    8H ; Refresh
    2H ; Retry
    1W ; Expire
    1D ; Negative Cache TTL
);
@ IN NS vm1.ushamim.org.
vm1 IN A 192.168.19.53
vm2 IN A 192.168.19.166
vm3 IN A 192.168.19.3
With that done, all that needed to be done now is to ensure our config is correct and that the service starts properly. I did that with the following commands:
named-checkconf /etc/named.conf # check config file to make sure there were no errors
service named start # starts the DNS service
chkconfig named on # ensures the service will start on boot
And with that the primary DNS server has now been configured. In the next post I will go over how I setup the caching-only server as well as the DNS client.


How to use logs?
What exactly are you trying to look for in the logs?